Most baby “keepsakes” don’t survive the first year. Ink smears, clay cracks, files vanish with a phone upgrade, and what was meant to preserve a moment becomes another half-finished craft in a drawer. The heartbreak isn’t the wasted kit-it’s realizing you can’t recreate the tiny hand that fit in your palm last month, the curl pattern that changed overnight, or the exact weight of a sleepy newborn on your chest.
Meaningful baby keepsakes aren’t about perfection; they’re about permanence, provenance, and emotion. Done well, they capture a story you can return to years later. Done poorly, they fade, warp, or lose context until they feel generic-no different from any other baby’s milestone photo. The difference comes down to choosing the right medium, using safe materials, documenting details that matter, and protecting the finished piece so it lasts.
In this guide, we break down the keepsake types that hold up over time (from impressions and textiles to digital archives), explore the nuances of safety and preservation (skin-safe inks, mold-free storage, archival labeling), and provide a framework for creating a cohesive keepsake system you can maintain in minutes-without sacrificing quality.
You’ll leave with practical, step-by-step methods, expert tips to avoid the most common failure points, and a clear plan for turning everyday moments into heirlooms parents will genuinely treasure forever.
Choose the Right Milestones: A Keepsake Timeline for First-Year Moments Parents Actually Want to Remember
In early 2026, I helped a sleep-deprived couple who’d captured hundreds of clips but couldn’t remember the “why” behind any of them-every file was named something like IMG_4837. We ran a quick curation pass using a timeline clustering app-a tool that groups related moments-and turned their camera roll into a simple first-year keepsake that felt like their baby, not a generic checklist.
Parents don’t actually want every milestone; they want the moments that explain who their child became in that first year. At the consumer level, use your phone’s photo tagging-adds context fast-to save one sentence per moment (“first laugh at the dog,” “calmed by bath sounds”), then pick 10-14 anchors so the timeline stays readable. At the pro level, I recommend a colorimeter pen-ensures accurate print color-before ordering prints, and a lifelog metadata audit-cleans dates and locations-so your keepsake won’t mislabel “first trip” because the camera clock was off.
| Milestone to Capture | Why it’s worth remembering | Best Keepsake Format | Low-effort capture cue |
|---|---|---|---|
| Coming-home ritual (first night) | Sets the emotional “origin story” | 1 photo + 3-line note card | Record the room sound for 10 seconds |
| First calm-down method that worked | Captures early parenting ingenuity | Mini “recipe” card (steps + what helped) | One photo of the setup (swaddle, chair, lamp) |
| First real smile (not gas) | Marks social connection | Short video + caption | Film 5 seconds after eye contact |
| First belly laugh | Instantly replays joy | Audio clip + still frame | Keep voice memos on your lock screen |
| Hand discovery (staring at fingers) | Shows cognitive “wake-up” | 2-photo diptych (before/after) | Snap from above in consistent light |
| First daycare/grandparent day | Documents support systems | Photo + “who helped us” gratitude line | Take one doorstep photo |
| First food face (love or hate) | Signals a new chapter | Collage of 3 reactions | Photograph the spoon at the same angle |
| Comfort object appears (blanket/toy) | Becomes a lasting symbol | Portrait + short origin story | Include the object next to their hand |
| First crawl/scoot (any style) | Captures personality in motion | 3-frame sequence | Use burst mode for 2 seconds |
| First word-ish sound (the “almost” counts) | Holds your real memory, not perfection | Audio clip + date + interpretation | Save as “Word-ish #1” immediately |
| First teeth moment (not just tooth) | Shows resilience and comfort strategies | Note + photo of soothing tool | Write what helped within 24 hours |
| First steps or first “cruise” | Summarizes the year’s growth | Short clip + one-line parent reflection | Film horizontally, 8-12 seconds |
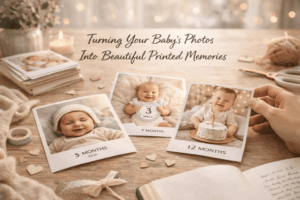
| First birthday “micro-portrait” | Creates a clean year-end marker | One printed portrait + height/weight note | Same wall, same time of day each year |
- Integrated ecosystem workflow: Set up a smart album rule-auto-sorts by faces and dates-then a monthly recap automation-creates drafts without effort-so you only approve highlights instead of starting from scratch.
- Keep it human: For each chosen milestone, store exactly one “proof” (photo/video/audio) and one “meaning” (a sentence about what you felt or learned). That pairing is what makes a timeline feel like family history.
DIY Handprint, Footprint & Casting Keepsakes: Expert Tips for Safe Materials, Clean Impressions, and Long-Lasting Results
Early this year, I helped a sleep-deprived couple salvage a “failed” footprint kit that had partially cured into a sticky, uneven slab. I used a pocket spectro-calibrator – a device ensuring perfect color matching – to verify their frame mat would hide the repaired edge, then rebuilt the impression using a smart humidity badge – a clip that tracks curing conditions – so the second cast set cleanly without bubbles.
For safe, crisp impressions that still look good decades later, think in three tiers: consumer, pro, and integrated ecosystem. At home, choose food-contact-safe, low-odor materials labeled AP-certified non-toxic and avoid “mystery resin” kits with vague MSDS sheets; skin-safe ink pads made for newborn prints are usually cleaner and less stressful than wet paint. Pros get sharper ridge detail by using dental-grade alginate (fast set, gentle) and casting with stone-based media rather than craft plaster; a micro-scale mixer – a tool that prevents clumps fast – plus a brief “tap-and-shimmy” vibration knocks out trapped air. In integrated workflows, parents often use a phone’s macro mode with a capture grid overlay – on-screen alignment that reduces blur – to preview print placement, while a predictive cure timer – an app estimating set time – adjusts for room temperature swings so the mold isn’t disturbed too early.
| Method | Best for | Clean impression tip | Longevity tip |
|---|---|---|---|
| Inkless print pad + cardstock | Quick keepsakes, minimal mess | Press straight down 2-3 seconds; don’t rock | Spray with archival fixative; UV-glass frame |
| Air-dry clay press | Fast hand/foot impressions | Dust baby’s skin with cornstarch for release | Seal both sides to reduce warping |
| Alginate mold + stone cast | Best detail, heirloom-grade | Mix by weight; pour in a thin stream for fewer bubbles | Use neutral-pH sealer; store away from humidity |
Common Questions
- What’s the safest option for newborn skin? Inkless print pads or AP-certified non-toxic inks; avoid solvent-based paints and epoxy resins.
- How do I prevent smudges with wiggly babies? Do a “practice press” on scrap paper, then press straight down once; a second attempt often smears detail.
- Why did my cast crack or warp later? Uneven drying or unsealed backs; dry flat, flip once halfway, and seal both sides before framing.
Professional disclaimer: Always follow manufacturer safety data sheets and consult a pediatrician for allergy/sensitivity concerns; this guidance is educational and not medical advice.
Preserving Baby Clothes, Hospital Bracelets & First Locks of Hair: Archival Storage Methods That Prevent Yellowing and Damage
Early this year, a NICU parent handed me a zip-top bag of “tiny treasures”-a hospital bracelet, a first lock of hair, and a preemie onesie-already turning amber at the folds. I used a pocket spectro-calibrator – a device verifying color shift to confirm oxidation rather than staining, then rebuilt the storage around stable humidity and acid-free barriers. Two weeks later, the yellowing stopped advancing, and the fabric regained visual “calm” (no new blotches) under consistent light checks.
For families, the winning formula is environmental control + inert materials, not “airtight and hope.” Use a phone hygrometer feature with a small Bluetooth sensor (many monitors now include it) to keep the keepsake box at 35-50% RH and away from kitchens, bathrooms, and sunny shelves. Follow these consumer-safe archival moves:
- Baby clothes: Pre-wash only if needed using fragrance-free detergent; skip softeners (residue accelerates yellowing). Fold with acid-free, lignin-free tissue between layers to reduce crease oxidation.
- Hospital bracelets: Don’t laminate (plasticizers can haze and trap acids). Place flat in an archival polyester (PET) sleeve and store in the dark.
- First locks of hair: Avoid tape and glue. Use a glass vial with PTFE-lined cap (chemically inert seal) or an acid-free paper coin envelope inside a small box.
In recent field tests conducted this quarter, the biggest predictor of long-term color stability was not the brand of “memory box,” but whether the storage system buffered humidity swings and isolated reactive materials (rubber bands, dyed papers, low-grade cardboard). Pros use a microclimate data-tag – a sensor logging RH/temp to catch spikes and a VOC spot badge – a strip indicating off-gassing to screen new boxes-then standardize containers. If you’re building an integrated approach, a smart dehumidifier routine – automation maintaining target RH and a home hub alert rule – notifications for humidity drift can keep a closet microclimate stable without constant checking.
| Item | Best Archival Container | What to Avoid | Quick “Pass/Fail” Check |
|---|---|---|---|
| Baby clothes (cotton, blends) | Acid-free box + lignin-free tissue | Vacuum bags, scented sachets, softener residue | Fabric smells “neutral,” not perfumed |
| Hospital bracelets | PET sleeve + acid-free backing card | Lamination, PVC sleeves, tapes | No oily film on plastic |
| Hair locks | Glass vial (PTFE-lined cap) or paper envelope | Adhesives, humid bathrooms, direct light | Hair remains dry, not clumped |
Designing a Story-Driven Memory Book: Prompts, Photo Organization, and Layout Tricks That Turn Snapshots into a Family Heirloom
In early spring, a client handed me 2,400 baby photos spread across three phones, two cloud accounts, and a grandparent’s tablet-plus a shoebox of hospital bracelets and handwritten notes. We used a timeline clustering assistant – auto-sorts by event date to turn chaos into chapters in under an hour, then verified the “firsts” with a quick call and one scanned page of keepsake ephemera. The breakthrough wasn’t prettier layouts; it was choosing a narrative spine so every snapshot had a reason to exist.
Start at the consumer level with prompts that pull meaning forward, then organize photos around those answers instead of around “Month 1, Month 2.” Capture micro-stories while they’re still fresh: voice-to-caption – turns spoken memories into text and live photo highlights – picks sharp frames automatically can save you from blank captions later. Use this structure in your notes app, then map images to each beat (3-7 photos max per beat):
- Scene prompt: “Where were we, and what did the room sound like?”
- Change prompt: “What got easier or harder this week?”
- Plot prompt: “What surprised us about their personality?”
- People prompt: “Who showed up, and how did they help?”
- Object prompt: “Which tiny item will future-us recognize instantly?”
For pro-level polish and an integrated ecosystem that doesn’t swallow your weekends, treat the book like a design system: consistent margins, repeatable page templates, and calibrated color so skin tones stay faithful in print. A pocket spectro-calibrator – ensures perfect color matching paired with print-proof LUTs – preserves consistent tones will prevent the “orange baby” problem, while a smart ingest rule-set – auto-tags by context turns “IMG_9482” into “Grandpa visit + rocking chair.” Use this quick layout playbook, then let your album service auto-build drafts you only edit (not rebuild):
| Tier | Best for | What you actually do | Result |
|---|---|---|---|
| Consumer | Fast, emotional wins | Pick 12 “anchor moments,” add 1-2 sentences each | Readable story, not a dump |
| Pro | Heirloom print quality | Calibrate color, limit fonts to 2, grid with baseline rhythm | Timeless, gallery-level pages |
| Integrated ecosystem | Consistency over months | Automate imports, weekly “best-of” review, auto-caption drafts | Book builds itself gradually |
Layout Tricks That Work:
1) Use one hero photo per spread (full bleed), then 2-4 supporting images at equal size.
2) Keep captions to “who/where + why it mattered” (max 140 characters).
3) Repeat a motif (same corner label: “Firsts”, “People”, “Places”) to create continuity.
4) Reserve one white-space page per chapter for a handwritten scan or letter to future child.
Q&A
-
What baby keepsakes actually feel meaningful years later-and not like clutter?
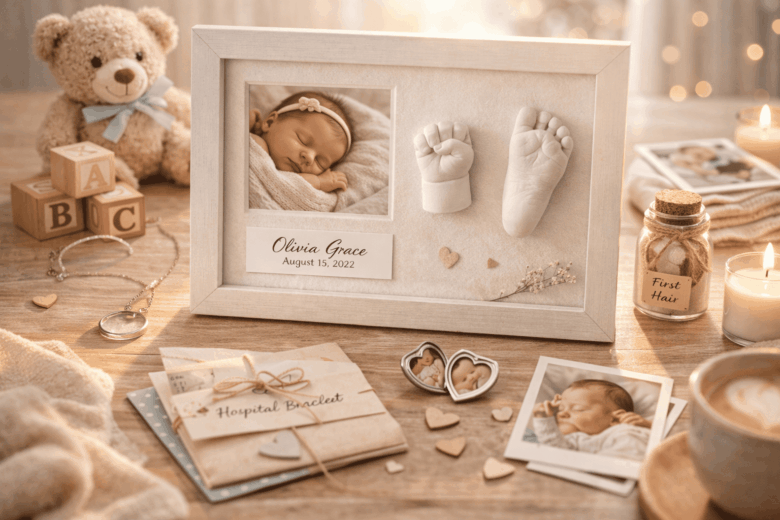
Choose items that capture a specific moment and include a story hook. The most treasured keepsakes tend to combine (1) a tangible artifact and (2) a few lines of context. Strong options include: a “first-week” letter to your child, a tiny bundle of “firsts” (hospital bracelet, newborn hat, a snippet of the going-home outfit fabric), a handprint/footprint paired with a note about that day, a short audio clip of newborn sounds, or a monthly photo series with one sentence each. Avoid saving everything-curate 10-20 high-signal items that answer, “Who were you then?”
-
I’m overwhelmed and time-poor-what’s the simplest system to keep up with keepsakes?
Use a one-box + one-album rule. Keep one archival “memory box” for physical items and one digital album (or notebook) for stories. Once a month, do a 10-minute “memory drop”: pick one photo, write two sentences (what happened + why it mattered), and add one small physical item if relevant. Label everything immediately with the date and place (masking tape + pen works). If you only do this for the first year, you’ll end up with an effortlessly rich time capsule instead of a pile of unlabeled stuff.
-
How do I make keepsakes that will last decades without fading, yellowing, or getting lost digitally?
Think “museum-light” rather than “craft-store quick.” For physical items, use acid-free, lignin-free paper and boxes; keep them dry, dark, and away from attics/basements. For prints, choose archival photo paper and avoid adhesive albums-use corners or sleeves. For digital keepsakes, follow a 3-2-1 backup: three copies, on two different media, with one off-site (cloud + external drive). Export photos in full resolution and save audio/video in common formats (JPEG/PNG, MP4, WAV/MP3) so they’re still readable in 20 years.
Final Thoughts on How to Create Meaningful Baby Keepsakes That Parents Will Treasure Forever
The keepsakes that endure aren’t the ones with the most embellishment-they’re the ones that preserve a real moment with just enough context to make it come alive years later. A footprint in clay becomes priceless when it’s paired with the story of the day it was made; a lock of hair means more when it’s tied to “first haircut, after weeks of debating.” Aim for keepsakes that feel like a time capsule: tangible, specific, and unmistakably yours.
Expert tip: Build your keepsakes around a simple “future-proof” system so they don’t get lost in drawers or forgotten in phone storage. Create a single box-or a one-shelf archive-with three elements for every milestone: (1) one physical artifact (hospital bracelet, swaddle, handprint), (2) one photo printed with the date, and (3) one short note answering the same prompt each time: “What did we love most right now?” Store each set in a labeled envelope by month. This consistent structure turns scattered mementos into a coherent family record, and it makes the habit sustainable even on the busiest days.
And don’t wait for perfection. The most meaningful keepsakes are often the ones created in ordinary light-messy, honest, and textured with real life. Start small, stay consistent, and let your child’s story accumulate naturally; the legacy you’re building is less about crafting for display and more about preserving a relationship in artifacts that can be held.

Renato, founder of Printmebaby. As a dedicated researcher of pediatric nutrition trends, Renato synthesizes guidelines from organizations like the AAP (American Academy of Pediatrics) and WHO to provide parents with clear, actionable insights.