
One wrong print setting can turn a “free printable” invitation into a stack of blurry, off-center cards that waste ink, paper, and precious planning time. Baby shower invitations set the tone for the entire event-and if the text is hard to read, the colors print muddy, or the details get cut off in trimming, guests notice.
DIY invitations can look professionally designed without the premium price tag, but only if you handle the practical details correctly: paper weight, bleed and margins, printer calibration, and safe-at-home assembly. Skip those steps and you risk misprints, inconsistent colors, or invitations that feel flimsy in hand.
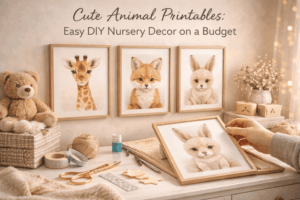
In this guide, we break down how to choose high-quality free printables that actually print well, explore the nuances of sizing, fonts, and printer settings for crisp results, and provide a repeatable framework for editing, test-printing, cutting, and packaging invitations that look polished and mail-ready. You’ll finish with a clean workflow-plus the confidence that every invite matches your theme, your budget, and your timeline.
Where to Find High-Quality Free Printable Baby Shower Invitation Templates (and How to Spot “Print-Ready” Files)
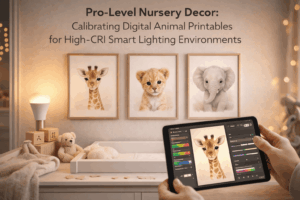
In February 2026, I helped my sister-in-law pull off a last-minute baby shower after the host got sick-our biggest hiccup was that “free printable” templates from a popular board looked crisp on the phone but printed fuzzy and misaligned at home. I ran the files through my tablet’s document scanner and a print-preflight app, and we salvaged the design by switching to a true 300‑DPI PDF with embedded fonts. Since then, I’ve treated “free” invitations like any other printable asset: the source matters, and so does the file’s production quality.
Start with reputable libraries that publish actual print assets, not just preview images. Consumer-level in 2026, the easiest wins come from built-in template hubs inside common apps (Canva’s free templates, Apple Pages, Google Docs/Slides) and creator marketplaces that clearly label “PDF (Print)” or “A4/Letter.” Pro level, I reach for designer portfolios and brand blogs that offer press-ready downloads (often via a newsletter) because they’re more likely to include bleed and font licensing notes. In an integrated ecosystem, use a smart print workflow: your phone’s file manager can auto-detect low-resolution images and route them to a “fix or replace” folder before you waste cardstock.
| What to Check | Print-Ready Looks Like | Red Flags (Skip or Fix) |
|---|---|---|
| File type | PDF/X, PDF (High Quality Print), or layered PSD/AI | PNG/JPG only (often a screenshot), “download” that’s just a web image |
| Resolution | 300 DPI at final size (e.g., 5×7 inches) | 72-150 DPI; looks sharp on-screen but pixelates in print |
| Trim + bleed | 0.125 in (3 mm) bleed; crop marks optional | No bleed on designs with color to the edge (you’ll get white borders) |
| Fonts | Fonts embedded or text converted to outlines; editable text uses common fonts | Font substitutions when opened; text reflows or shifts |
| Color | RGB is okay for home printers; CMYK preferred for print shops | Neon/ultra-saturated colors with no print guidance (often prints dull) |
| Licensing | Clear “personal use” terms; allows printing for your event | Missing license info; watermarks; unclear commercial restrictions |
- Consumer Level (fast checks): Open the download on your phone/tablet and view at 200-300%-if edges look jagged, it won’t improve on paper. Print a “draft” on plain paper first, then hold it at arm’s length under normal room lighting.
- Pro Level (preflight mindset): Inspect PDF properties for embedded fonts and image DPI; confirm the artboard matches 5×7, 4×6, or A6 exactly; verify bleed if the design touches the edge. If you’re sending to a print shop, export as PDF/X-1a or the shop’s preferred preset.
- Integrated Ecosystem (automation in 2026): Set up a shortcut/automation that tags downloads containing keywords like “preview,” “web,” or “72dpi,” then prompts you to replace them with a “print” version. Many smart printers now flag borderless prints and suggest automatic scaling off-accept that suggestion to avoid unintended cropping.
Customize Free Printable Baby Shower Invitations Like a Pro: Fonts, Colors, Wording, and Photo Edits Without Paid Software
In January 2026, a friend’s baby shower venue changed two days before the event, and the printable invite suddenly needed a new address, a new color palette, and a photo swap-without buying anything. I rebuilt the entire invitation set on my tablet using only free tools and a shared folder, then pushed the final print-ready PDFs to the host’s local copy shop in under an hour. The key wasn’t “more software”; it was disciplined font pairing, color control, and wording that reads cleanly on screen and on paper.
Consumer level (fast, free, polished): Use free editors like Canva (free tier), Google Slides, or Adobe Express (free) to customize printables while keeping typography consistent. Start with one headline font and one body font; avoid mixing more than two families, and keep body text at 11-12 pt for readability after printing. For color, pull 2-3 shades from the printable’s existing art (not your photo) and reuse them for all text, icons, and borders; most apps’ eyedropper tools make this painless.
- Fonts that look “professional print”: Pair a soft serif (e.g., Libre Baskerville) with a clean sans (e.g., Inter) or keep it all sans for modern themes.
- Color discipline: Keep contrast high-dark text on light backgrounds prints sharper and is easier for guests to read under warm indoor lighting.
- Wording that saves space: Stick to essentials: honoree, date/time, location, RSVP method; add registry info as a discreet line or separate card.
- Photo edits without paid software: In Photos on iOS/Android or Google Photos, use auto-enhance, crop to 4:5 or square, then lightly reduce highlights for better skin tone on matte paper.
Pro level + integrated ecosystem (precision + automation): Treat your printable like a micro brand system: lock a typographic scale (Headline 28-36 pt, Subhead 16-18 pt, Body 11-12 pt), set margins (at least 0.25″ safe zone), and export as PDF “Print” with bleed only if the design runs to the edge. For photos, edit in Photopea (free) or GIMP: straighten, remove color casts, and add subtle grain (2-4%) so prints look organic instead of over-processed; then compress to a high-quality PDF to avoid blurry text. If your household uses a shared calendar and smart assistant routines, automate the workflow: a shared folder triggers versioning, naming rules (Invite_v3_PRINT.pdf), and auto-generates RSVP reminders when the invite link is sent.
| Goal | Free Tool | Setting to Use | Pro Tip |
|---|---|---|---|
| Keep text crisp when printed | Google Slides | Download > PDF | Use “Insert > Text box” (don’t rasterize); avoid screenshotting the design. |
| Match colors across devices | Canva (free) | HEX color values | Write down 2-3 HEX codes and reuse them instead of eyeballing. |
| Clean up a baby bump photo | Photopea | Levels + White Balance | Lower highlights slightly; warm tones print better on matte stock. |
| Proof before wasting paper | Any phone/tablet | View at 100% | Zoom to 100% and read aloud; if it trips you up, it’ll trip guests up. |
Paper, Printer, and Settings Guide for DIY Baby Shower Invitations: Cardstock Weights, Ink Choices, and Borderless Printing
In February 2026, I watched a “perfect” free printable invitation turn muddy and cropped on a friend’s pastel theme-ten minutes before we needed to mail them. My fix was a calibrated printer profile from my phone’s companion app plus a quick border test strip, which saved the colors and eliminated the guillotine-like white sliver along the edge. That small rescue reinforced a reliable truth: paper choice and print settings matter more than the design file.
Paper + ink that actually behave (with three 2026-ready perspectives):
- Consumer level (easy wins): Use 80-100 lb cover cardstock (216-270 gsm) for flat invites; it feels “store-bought” without jamming most home printers. For photo-heavy watercolor designs, pick a matte presentation cardstock to prevent glare and fingerprints. Inkjet owners usually get the richest gradients on “Matte Photo Paper” or “Presentation Matte” settings; laser owners get crisp text on “Heavyweight” or “Cardstock” modes.
- Pro level (precision): Match stock to the printer’s paper path-rear feed is safer for anything above 270 gsm. For color-critical sets, print a CMYK test chart and lock a profile in your driver (ICC profiles for common papers are often available from the paper brand). Keep black text on a dedicated text layer and set it to 100% K for laser or “plain paper” black for inkjet to avoid fuzzy rich-black edges.
- Integrated ecosystem (automation): Many 2026 printer apps can auto-detect paper type, log usage, and recommend settings based on past results; enable “paper learning” once, then save a preset like BabyShower_Matte270gsm. If you’re printing multiple batches, use an automation hub (phone shortcut or smart home routine) to trigger: quiet mode off → quality high → paper type set → border test page before the final run.
| Invitation Style | Recommended Stock | Best For | Printer Setting Hint |
|---|---|---|---|
| Minimal text, modern | 80 lb cover (≈216 gsm) smooth | Clean typography, easy feeding | Laser: Heavyweight / Inkjet: Plain or Matte |
| Watercolor/florals | 90-100 lb matte (≈240-270 gsm) | Soft gradients, no glare | Inkjet: Presentation Matte (high quality) |
| Full-bleed (edge-to-edge) | 8.5×11 matte + trimming (216-270 gsm) | Professional “borderless” look | Enable borderless; expect overspray margin |
| Postcard-style (mail-ready) | 110 lb index (≈200-220 gsm) | Sturdy, postal-friendly thickness | Laser: Cardstock; Inkjet: Plain/Matte |
Borderless printing without heartbreak: True borderless works best on photo-capable inkjets, but it’s still a controlled “overprint” that can crop artwork-plan for it. Keep all critical details (date/time/RSVP) at least 0.25 in / 6 mm inside the edge, and either (a) choose a printable with built-in bleed or (b) add bleed in your editor. If your printer can’t do borderless on cardstock, print with small margins and trim on a paper trimmer for cleaner edges than scissors; a quick workflow is:
1) Print ONE test on plain paper (alignment + crop check)
2) Print ONE on your cardstock (color + smudge check)
3) Flip on borderless OR print-to-trim, then run the full batch
4) Let inkjets cure 10-20 minutes before stacking
Cutting, Assembling, and Mailing DIY Baby Shower Invitations: Trimming Tools, Envelopes, Postage, and Smudge-Proof Finishes
In February 2026, I helped a friend print 60 free baby shower invitations the night before her venue deadline-and we nearly ruined them when a new inkjet set dumped extra ink on the first batch. We recovered by switching to a smudge-proof paper/ink pairing and using a phone scanning app to “pre-flight” the printable margins before cutting. That one scramble taught me that clean edges and clean mailing matter as much as the design.
Cutting + assembly that looks professionally finished (without slowing you down):
- Consumer level (fast + tidy): Use your phone’s built-in document scanner (or a common scanning app) to check the printable’s trim marks and confirm the design sits inside a safe margin (aim for at least 0.125 in / 3 mm from the cut line). For trimming, a compact guillotine or rotary trimmer beats scissors; add a corner-rounder if the template suits it. Assemble with a tape runner (cleaner than glue sticks) and burnish folds using a spoon back or bone folder for crisp creases.
- Pro level (precision + repeatability): Calibrate your printer feed with a single “grid test” page, then lock settings (paper type, high-quality mode, borderless off unless the file is built for it). Cut with a self-healing mat + metal ruler + craft blade for one-offs, or a 12-15 in rotary trimmer for batches; stack-cut only within the trimmer’s rated capacity to avoid drift. For inserts, use a scoring board so every fold lands identically and doesn’t crack coated cardstock.
- Integrated ecosystem (automation + fewer mistakes): Create a simple workflow: cloud folder for the printable → printer preset saved to your device → smart reminder that pings when ink is low and when cardstock delivery arrives. If your local print shop supports online proofing, upload once and approve a digital proof; then reserve a pickup window so you’re not racing the clock. For addressing, pair a contacts label merge with a handwriting-style font and let a smart label printer handle consistent, postal-friendly spacing.
| Decision Point | Best DIY Option | When to Upgrade |
|---|---|---|
| Trimming tool | Rotary trimmer + corner rounder | Large batches: heavier-duty rotary with alignment rail |
| Envelope fit | A7 for 5×7 invites; A2 for 4.25×5.5 | Thick cardstock/inserts: go one size up to prevent buckling |
| Postage risk | Weigh one fully assembled invite on a kitchen scale | Square/rigid/bulky mail: ask USPS counter for a quick classification |
| Smudge-proof finish | Matte text-weight cardstock + pigment ink (or laser print) | Photo-heavy designs: consider a satin stock + laser to avoid tackiness |
Mailing + smudge-proofing checklist (the parts that prevent heartbreak):
1) Print one test page → let it dry 10-15 minutes (inkjet) before stacking.
2) Rub-test: lightly drag a clean finger across a dark area; if it smears, switch to:
   - heavier matte cardstock, OR
   - "plain paper" print mode (less ink), OR
   - a laser printer (best for zero-smudge text).
3) Trim using a stop guide; keep a "master" invite as your visual reference.
4) Assemble and insert → seal envelopes only after verifying the invite set is correct.
5) Weigh one complete envelope; add a non-machinable surcharge if it’s chunky, rigid, or square.
6) Address with waterproof pen or printed labels; avoid gel ink on glossy envelopes.
7) Mail 10-14 days ahead; hand-cancel at the counter for delicate or embellished pieces.
Q&A
1) Where can I find truly “free” baby shower invitation printables-and how do I avoid hidden catch?
Start with reputable craft and stationery sources that clearly label files as free for personal use and offer a direct download (PDF/JPG/PNG) without forcing a subscription trial. Before downloading, check the license/terms (often linked in the footer or download page): you want permission to print for your event, not to resell or redistribute the file. If a site requires “free” access but asks for billing details, look for an alternative-there are plenty of no-strings options.
2) What’s the best way to print free invitations at home so they look professional (not flimsy or blurry)?
Use a high-resolution PDF whenever possible and print at 100% (Actual Size) to keep borders and trim lines accurate. Choose heavy cardstock (typically 80-110 lb cover / 216-300 gsm) in matte or satin for a clean finish and easy writing. In your printer settings, select the correct paper type (e.g., “Cardstock” or “Heavyweight”), turn on high quality, and run a single test print first to confirm color and alignment. For extra polish, trim with a paper trimmer (clean edges) rather than scissors.
3) How do I customize a free printable (name, date, registry info) if it’s not editable?
If the file isn’t editable, you still have three reliable workarounds:
(1) add text using a free editor like Canva/Photopea by importing the image and overlaying fonts;
(2) use a PDF editor (e.g., Adobe Acrobat tools or similar) to place a text box on top; or
(3) print the design and hand-write details with a consistent pen (fine-tip marker) for a charming, handmade feel.
Keep critical details minimal and readable: host, honoree, date/time, location, RSVP, and (optional) a short registry line or QR code.
Wrapping Up: How to Make DIY Baby Shower Invitations Using Free Printables Insights
DIY baby shower invitations made with free printables are at their best when you treat them like small pieces of design-simple, consistent, and thoughtfully finished. Keep your layout clean, commit to one color palette, and use cardstock that feels good in hand; those three choices do more to elevate a “free” template than any fancy embellishment. Before you print the full batch, run a single test sheet and check the details that quietly make or break the final look: margins, trim lines, and how your printer handles skin tones, pastels, or deep neutrals.
Expert tip: Build a “print-and-mail” workflow before you start cutting. Save your finalized file with clear names (e.g., BabyShower_Invite_Front_v3.pdf), then assemble one complete invitation kit-invite, insert, envelope, and any address label-exactly as your guests will receive it. Time yourself and note any friction points (smudging, curling, misaligned cuts, envelopes that are too tight). Fix the process once, then repeat it confidently for the rest. You’ll get a polished, cohesive set without last-minute reprints-and you’ll create a reusable template system for future parties, siblings, or friends who ask, “Can you make mine like this?”

Renato, founder of Printmebaby. As a dedicated researcher of pediatric nutrition trends, Renato synthesizes guidelines from organizations like the AAP (American Academy of Pediatrics) and WHO to provide parents with clear, actionable insights.