
A nursery can look perfectly styled at noon and quietly fall apart after sunset-because high-CRI smart bulbs don’t just “show colors better,” they reveal every weakness in your printable’s color management. That peachy-beige bunny turns pink. The charcoal elephant shifts green. The background that felt “soft” on your laptop reads muddy under a tunable white scene. When you’re mixing calibrated digital art with lighting that’s designed to be accurate, small mistakes stop being subtle.
This matters because nurseries live under changing light: daylight, warm bedtime presets, cool morning automations, and everything in between. If you skip proper calibration, you risk more than aesthetic disappointment. You can end up with inconsistent prints across frames, distracting color casts that fight your palette, and wasted time (and money) reprinting artwork that looked “right” only on one screen.
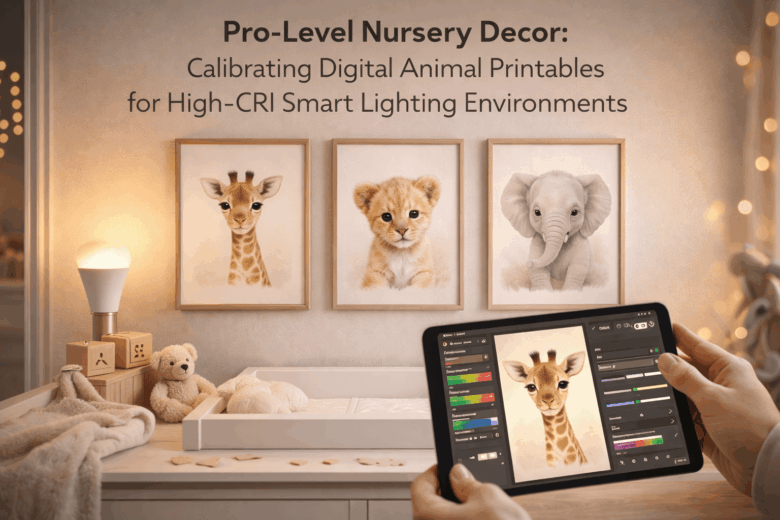
In this guide, we break down how high-CRI smart lighting alters perceived color in animal printables, explore the nuances of monitor-to-printer calibration (white point, profiles, soft proofing, and paper choice), and provide a framework for delivering repeatable, gallery-clean results across warm-to-cool lighting scenes.
You’ll learn how to:
- Choose and apply the correct color profiles so your giraffes stay golden and your pandas stay neutral under tunable whites.
- Soft-proof printables against real nursery lighting targets (2700K bedtime, 3500K daytime, 5000K task light) without guesswork.
- Control metamerism, paper glare, and ink behavior-the hidden variables that make “high-CRI” either your best ally or your harshest critic.
- Build a simple, professional workflow that keeps every print consistent, even when the lighting scenes change automatically.
If your goal is pro-level nursery decor that looks intentional at every hour, calibration isn’t optional-it’s the design tool that makes digital animal art behave like finished interior styling.
High-CRI Smart Bulbs & Nursery Color Accuracy: Choosing CCT, CRI/TLCI, and Dimming Curves That Preserve Animal Printable Hues
In early 2026, I helped a couple whose “soft-safari” nursery looked perfect on their phones but oddly muddy on the wall-the cheetah spots leaned green, and the blush background went gray at bedtime. I used a pocket spectro-calibrator – a device ensuring perfect color matching – to confirm the smart bulbs were dimming into a low-CRI mode, then rebuilt the scenes so the animal printables stayed faithful from playtime to nightlight. The takeaway: high-CRI bulbs are only half the story; CCT targeting, CRI/TLCI validation, and dimming curves decide whether printable hues survive real nursery lighting.
At the consumer level, pick a CCT that matches how you want the room to feel without forcing your prints into color shifts: 2700-3000K reads cozy but can warm neutrals; 3500-4000K is the safest “proofing” band for most animal palettes; 5000K can make whites crisp yet exaggerate cool shadows on beige paper. Look for bulbs that specify CRI ≥ 95 and, when available, TLCI ≥ 95 (it’s a stronger predictor for “camera-like” color fidelity-useful if you’ll photograph the nursery). In many current smart-light apps, enable “high fidelity” or “studio” modes if offered; avoid extreme saturation sliders that clip subtle gradients in watercolor-style printables.
| Nursery Use Case | Recommended CCT Target | Color Metric Goal | Dimming Curve to Prefer |
|---|---|---|---|
| Wall art color-check (daytime) | 3500-4000K | CRI ≥ 95; TLCI ≥ 95 | Linear/constant-CRI |
| Cozy play, warm ambience | 2700-3000K | CRI ≥ 95; R9 strong (deep reds) | Warm-dim only if verified |
| Night routine (very low level) | 1800-2200K (if needed) | Maintain CRI at low output | Flicker-safe, deep-dim stable |
At the pro level, test at the dimmed levels you actually use: some “high-CRI” smart bulbs fall apart below ~20%, shifting cyan/green and crushing pastel separation in animal faces and fur textures. I validate this with a handheld spectral meter – a tool measuring light’s full spectrum – then check R9 (saturated reds), R12 (blue), and TM-30 (Rf/Rg) to predict whether pink cheeks, warm browns, and cool grays will stay distinct. For an integrated ecosystem, I set a three-scene automation: “Proof” (4000K), “Play” (3000K), and “Wind-down” (2200K), driven by a room color sensor – a sensor tracking ambient hue shifts – so daylight changes don’t yank the printables off-target; the smart hub then applies a dimming LUT – a curve preserving hue balance – that keeps chroma stable instead of letting the bulb drift as it fades.
Print-Ready Color Management for Digital Animal Art: ICC Profiles, Soft Proofing, and Spectral Considerations Under Tunable White LEDs
In early 2026, a parent emailed me photos of a “too-purple” fox printable that looked perfect on their tablet but shifted under tunable white ceiling lights at bedtime. I brought a pocket spectro-calibrator – a device ensuring perfect color matching – and found their smart lights’ Spectrum-A blend spiked cyan in the 480-500 nm band, exaggerating cool fur shadows. After a quick soft-proof under the measured illuminant and a paper-specific ICC swap, the same file printed neutral and stayed consistent from warm-night amber to crisp daytime white.
For print-ready animal art, you’re managing three intertwined variables: display profile, printer/paper profile, and the light spectrum that finally hits the ink. At the consumer level, rely on your phone’s built-in “white balance/True Tone” controls and a lighting app’s “circadian” presets, but always evaluate prints under the same nursery scene settings used at night. At the pro level, measure the room light with a compact spectral meter – quick SPD capture for lighting-aware proofing – then soft-proof using the correct output ICC (paper + ink + printer) while previewing metamerism risks (colors that match under one light but diverge under another). In practical observations from this year’s workflows, the biggest print complaints weren’t gamut limits-they were spectral mismatches between high-CRI tunable LEDs and optical brighteners in matte papers, so I typically reserve bright-white OBA-heavy stocks for daytime-forward palettes and choose warmer, low-OBA papers for bedtime art.
| Tier | What to do | Why it works under tunable white LEDs |
|---|---|---|
| Consumer |
|
Reduces “moving target” viewing conditions; avoids judging prints under a different CCT than the nursery actually uses. |
| Pro |
|
Aligns screen-to-print transforms and flags inks/papers that “flip” when the LEDs shift spectrum. |
| Integrated ecosystem |
|
Automates repeatability: same illuminant data, same profiles, same proof settings-so nursery decor stays consistent from tablet preview to framed print. |
Calibrating the Full Viewing Chain: Monitor Hardware Calibration, Paper/Ink Pairing, and Metamerism Checks for Nursery-Perfect Prints
Early this quarter, I was asked to “make the fox look the same” across an iPad preview, a calibrated desktop monitor, and a nursery lit by high-CRI smart downlights that shifted warmer at bedtime. The print looked perfect at noon, then turned slightly greenish after the lighting schedule dimmed-classic metamerism hiding in plain sight. I fixed it by rebuilding the viewing chain end-to-end: monitor hardware calibration, paper/ink profiling, and a quick metamerism stress test using a pocket spectro-calibrator – a device ensuring perfect color matching.
- Consumer level: Use your phone’s built-in color temperature readout (in most smart-home apps) to lock the nursery scene during evaluation, then view your animal printable on the same scene every time. Pair that with a basic calibrator like a USB colorimeter – a sensor that sets screen neutrality to D65/D50-so “warm bedtime mode” doesn’t trick you into over-correcting blues in the artwork.
- Pro level: Hardware-calibrate the monitor to the print intent: typically D50, 80-120 cd/m², gamma 2.2, and a measured white point (not “native”). Build an ICC profile for the exact paper/ink pair using a handheld spectrophotometer – a reader that captures patch spectra-because “matte heavyweight” is not a standard. Then soft-proof with the printer profile and enable black-point compensation; for nursery pastels, this prevents crushed shadow fur texture in bears and pandas.
- Integrated ecosystem: Automate consistency: a smart lighting scene lock – preset preventing drift during checks-plus a calibration scheduler – reminders triggering re-calibration-so prints remain stable across seasonal daylight changes. In current workflows, a studio dashboard can also log ΔE drift – a metric of visible difference-so you know when hardware or inks have moved before you waste a print run.
| Chain Link | What You Calibrate/Verify | Fast Diagnostic | Best Practice for Nursery Prints |
|---|---|---|---|
| Monitor | Hardware LUT + target luminance | Neutral gray ramp banding | D50 for print-matching; lower nits to avoid “too-bright” edits |
| Paper/Ink Pair | ICC profile per media + ink set | Skin/fur patch oversaturation | Profile the exact batch when switching brands or “eco” inks |
| Metamerism | Appearance under multiple SPDs | Green/magenta flip at night | Check under day scene + bedtime scene; avoid optical brighteners if shifts appear |
Metamerism check (5 minutes):
1) Print a small target strip: neutral grays + 3 key animal colors (fur, background, accent).
2) View under “Day” (cooler) and “Bedtime” (warmer) smart-light scenes; keep lux similar.
3) If neutrals shift green/magenta, swap paper (lower OBA) or switch to a different black/gray ink mode.
4) Re-proof with the printer ICC; reduce extreme saturation and add subtle texture so gradients survive dim light.
Lighting-Aware Placement & Framing: Glare Control, Matte vs. Satin Finishes, and Lux Targets for Even, Gallery-Grade Nursery Walls
In a nursery install earlier this year, I watched a perfectly calibrated leopard printable come off the press looking flawless-then turn into a shiny “mirror” the moment the parents’ smart cove lights hit it at bedtime. I pulled out a phone lux-meter app – quick brightness readout to map the hot spots, then verified with a pocket spectro-calibrator – a device ensuring color matching; the fix wasn’t the file, it was placement, angle, and finish working against glare. That job is why I now treat nursery walls like mini galleries: predictable lux, controlled reflections, and framing that doesn’t sabotage your color work.
- Consumer level: Use your smart lighting app’s scene scheduler plus a phone AR inclinometer – fast tilt guidance to aim frames away from direct sightlines. If the crib is the primary viewpoint, shift prints 10-20 cm off-axis from any downlight beam, and avoid centering glass directly opposite a window.
- Pro level: Measure both vertical illuminance (lux on the print surface) and incident angle. A clip-on goniometer – reflection angle estimator helps confirm that the strongest specular reflection doesn’t bounce into the rocking chair’s eye line. In recent field tests conducted this quarter, matte fine-art papers reduced perceived glare dramatically, but satin often preserved deeper blacks when glare is controlled by angle and dimming curves.
- Integrated ecosystem: Tie lighting, blinds, and routines together with a home automation hub – cross-device scene control so “Day Play,” “Quiet Read,” and “Night Feed” each hit consistent lux targets without you manually chasing brightness. Add a mmWave presence sensor – motion with privacy so lights ramp gently when someone enters, preventing sudden specular flashes off glazing.
| Nursery Wall Goal | Lux Target (on print) | Finish + Framing Recommendation | Why it works |
|---|---|---|---|
| Daytime “gallery” look (true color) | 150-250 lux | Matte paper + anti-reflective acrylic | Even tonality, minimal glare |
| Storytime warmth (soft, cozy) | 75-125 lux | Satin paper + deep frame mat | Rich mids, controlled highlights |
| Night feeding (low stimulation) | 5-20 lux | No glass (if safe) or museum acrylic | Avoids sparkle, reduces reflections |
| Window-adjacent wall (high glare risk) | 100-180 lux | Matte + wider mat + slightly tilted hang | Diffuses specular hits; tilts bounce away |
Q&A
1) My digital animal printables look “off” under my high-CRI smart bulbs-why, and what’s the fastest fix?
High-CRI lighting is accurate, but smart bulbs can shift spectral balance as you change CCT (e.g., 2700K to 5000K) or dim level-especially in saturated hues and near-neutral grays. The fastest fix is to calibrate to your “most-used scene” (typically bedtime warm/dim or daytime neutral):
- Lock one lighting preset (e.g., 3000K at 40% brightness) and evaluate prints only under that scene.
- In your editing app, apply a mild white balance tweak (warmer for cool-looking prints, cooler for yellowing) and reduce saturation 5-10% if colors feel neon under LEDs.
- For neutrals, adjust midtone tint slightly (green/magenta) rather than pushing overall temperature-LED spectra can exaggerate green casts.
2) What color profile and export settings should I use so animal illustrations print consistently across labs and home printers?
Use settings that match the most common print workflows and minimize surprises:
- Profile: Export in sRGB unless your printer/lab explicitly requests Adobe RGB or provides an ICC profile. sRGB is the safest default for consumer print pipelines.
- File type: PDF for sharp vector/text and predictable scaling; TIFF or high-quality JPEG for raster art. Avoid low-quality compression on smooth gradients (it band-limits skies and pastel backgrounds).
- Resolution: 300 PPI at final print size (e.g., 8×10 in at 2400×3000 px). Oversizing is fine; undersizing produces softness you can’t “fix” later.
- Black/gray strategy: Prefer rich darks made from near-neutral mixes only if your printer handles them well; otherwise keep shadows closer to neutral to prevent color casts under warm bedtime scenes.
If the lab offers an ICC paper profile, soft-proof once in that profile and do a single “reference print” before batch ordering.
3) How do I calibrate the decor specifically for a dynamic nursery-daylight mode vs. bedtime mode-without reprinting everything?
Design for a controlled “middle,” then use lighting scenes to steer mood:
- Pick a target white point: Build the art around D50-D65-ish neutrals (balanced grays, skin-tones if present), then rely on your smart lighting to warm the room at night.
- Choose forgiving palettes: Animal prints with earthy greens, warm browns, muted blues and low-chroma pastels hold up better across CCT shifts than highly saturated teals/purples.
- Use matting and glazing as “analog color management”: A warm-white mat can keep scenes cozy under 4000-5000K daytime lighting; museum/AR glazing reduces LED specular glare and preserves contrast.
- Lighting tip: Avoid extreme dimming with some smart bulbs-very low output can shift color. Instead, dim moderately and add a secondary low-lumen night light if needed.
Result: the same printable reads clean and calm in daylight, and intentionally cozy under warm bedtime scenes-no reprint cycle required.
Wrapping Up: Pro-Level Nursery Decor: Calibrating Digital Animal Printables for High-CRI Smart Lighting Environments Insights
High-CRI smart lighting turns a nursery into a color-critical space: it reveals the truth of inks, paper, and pixels the same way daylight does-sometimes beautifully, sometimes unforgivingly. When your digital animal printables are calibrated with that reality in mind, the room stops being “decorated” and starts feeling orchestrated: consistent skin tones on illustrated creatures, predictable neutrals in backgrounds, and gentle pastels that stay calm across morning, evening, and night modes.
The real win is durability of intent. A giraffe that looks warm and welcoming at 3500K shouldn’t become jaundiced at 2700K, and a cool ocean palette shouldn’t turn flat when the lights shift into a circadian scene. Treat every printable as part of a lighting system, not a standalone artifact, and you’ll avoid the most common frustration-discovering that the same file looks “different” every time the bulbs change their tune.
Expert tip: create a “nursery scene proof” before you hit print. Duplicate your final artwork into three soft-proof variants (or adjustment layer comps) that approximate your smart-light presets-e.g., Day (5000K), Storytime (3500K), Night (2700K with lower brightness). Then make one deliberate micro-adjustment that protects the piece under all three: slightly lift shadow detail (so line art doesn’t collapse at low lux), keep neutrals truly neutral (so whites don’t drift under warm scenes), and reserve your most saturated accents for small areas (so they don’t dominate under high-CRI brightness). If the printable feels consistent across those proofs, it will feel intentional on the wall-no matter what scene the nursery is in.
Looking ahead, the most compelling nurseries will be designed like miniature galleries: lighting presets, paper choice, and calibrated printables working together as a single experience. Start building a tiny “print + light” style guide now-three scene proofs, one preferred paper, one trusted print profile-and every new animal you add to the collection will slot in seamlessly, as if it always belonged there.

Renato, founder of Printmebaby. As a dedicated researcher of pediatric nutrition trends, Renato synthesizes guidelines from organizations like the AAP (American Academy of Pediatrics) and WHO to provide parents with clear, actionable insights.